
📋 Table of Contents
- TL;DR
- Why Do You Need MetaMask?
- MetaMask Installation Guide (Browser Extension)
- MetaMask Installation Guide (Mobile App)
- Create Wallet vs Import Wallet
- Essential MetaMask Security Checklist
- FAQ
- About the Author
TL;DR
MetaMask is the most popular decentralized crypto wallet, supporting Ethereum and all EVM-compatible chains for managing on-chain assets and connecting to DApps. Always download from the official website metamask.io, and never share your private keys or seed phrase with anyone.
Why Do You Need MetaMask?
So you just bought some ETH on Binance or OKX and want to experience the real Web3 world — the first thing you need is a MetaMask wallet.
You might be wondering: I already have an exchange account, why do I need another wallet?
Great question. Here's the simple breakdown:
| Exchange Account | MetaMask Wallet | |
|---|---|---|
| Who controls your assets | The exchange | Only you |
| Registration required | Phone + ID verification | No personal info needed |
| Purpose | Buy, sell, trade crypto | Connect DApps, use DeFi, store NFTs |
| Private key custody | Held by the exchange | You hold it yourself |
Think of it this way: An exchange is like a bank account, MetaMask is like your own wallet. The money in your bank account is managed by the bank. The money in your own wallet is managed by you alone.
MetaMask Installation Guide (Browser Extension)
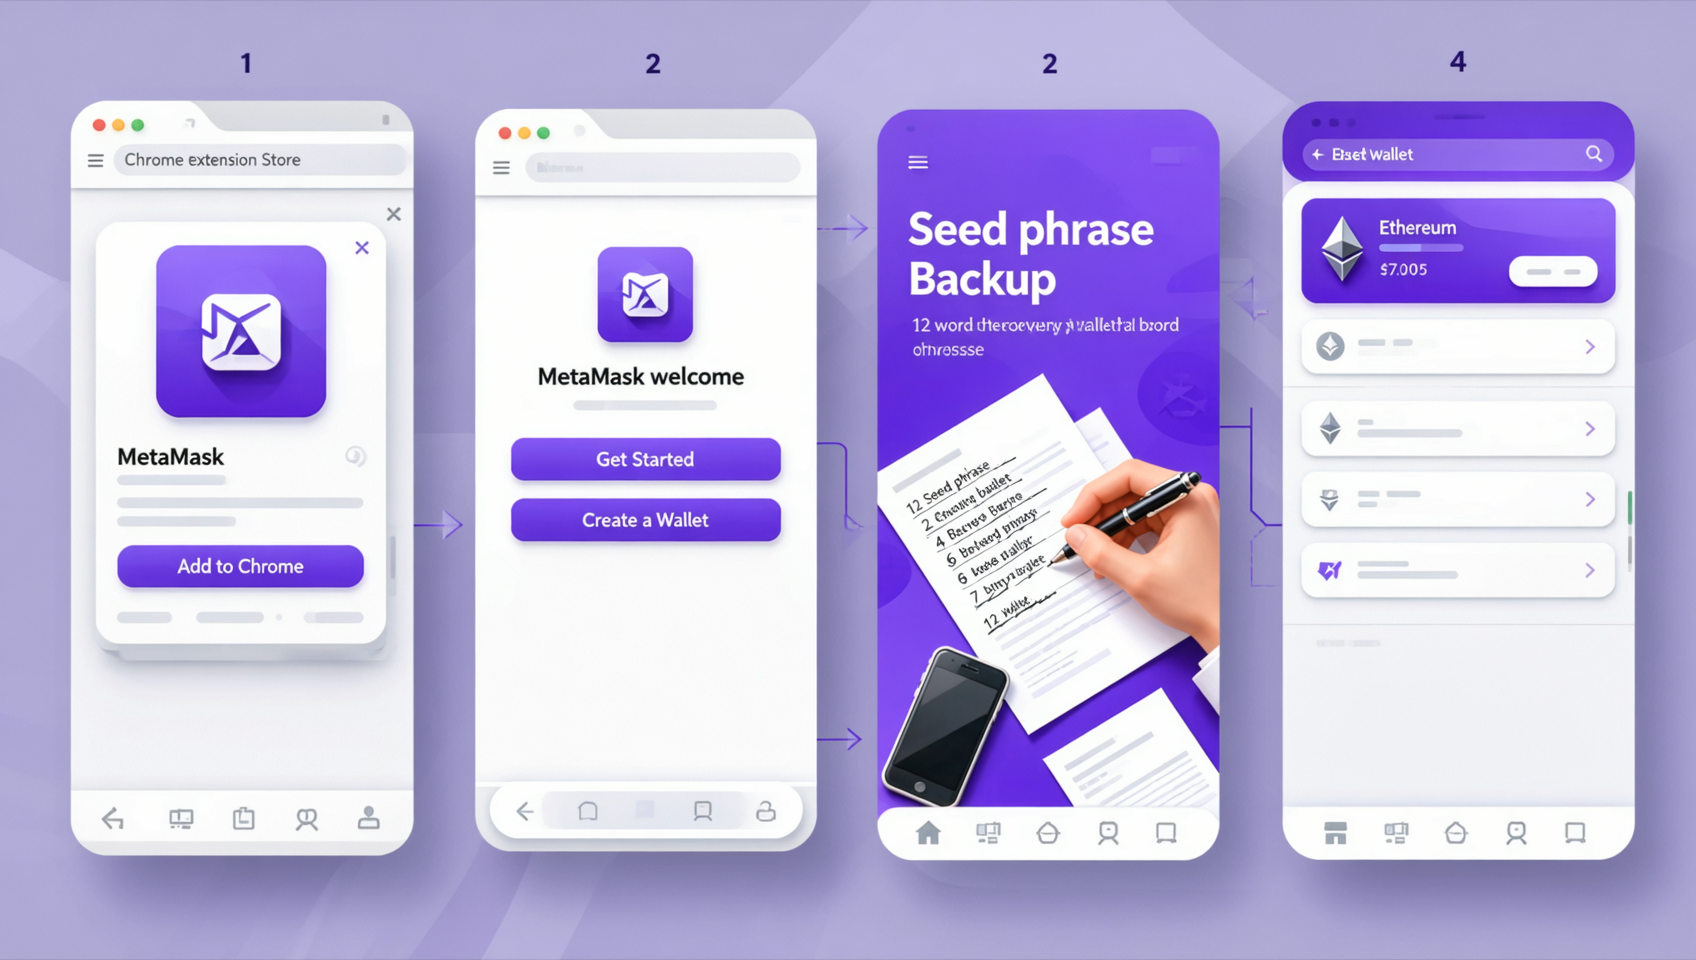
Step 1: Find the Official Website
🔐 Most important reminder: MetaMask has only one official website — https://metamask.io. When searching "MetaMask," double-check the link. Never click into phishing sites.
- Open Chrome/Firefox/Edge browser
- Visit https://metamask.io
- Click the "Download" button on the page
- Select your browser type (Chrome Extension / Firefox Add-on / Edge Extension)
- Click "Add to Browser" → Confirm
After installation, you'll see a little fox icon 🦊 in the top-right corner of your browser.
Step 2: Create Your Wallet
Click the fox icon and you'll see the welcome screen:
- Click "Get Started"
- Select "Create a Wallet"
- Set a password: At least 8 characters, mix of uppercase/lowercase letters and numbers
- Watch the security video: MetaMask will play a 1-minute seed phrase safety tutorial — definitely watch it
- Back up your seed phrase: This is the most critical step!
Step 3: Backup Your Seed Phrase (Absolutely Critical!)
Your seed phrase is 12 English words — it's the only way to recover your wallet. If you lose it, your funds are gone forever.
Proper backup practices:
- ✅ Write it down on paper, make two copies, store in separate secure locations
- ✅ Use a metal seed phrase backup plate (fireproof, waterproof)
- ❌ Do NOT screenshot and save on your phone
- ❌ Do NOT store in WeChat, messaging apps, or cloud notes
- ❌ Do NOT take a photo of it
⚠️ A true story: a friend of mine saved his seed phrase in WeChat Favorites. His phone was hacked and 2 ETH were transferred out instantly. Your seed phrase IS your money — treat it that way.
MetaMask Installation Guide (Mobile App)
The MetaMask mobile app lets you check your assets, make small transfers, or connect to mobile DApps on the go.
- iOS users: Search "MetaMask" on the App Store — the developer is MetaMask, millions of downloads
- Android users: Search "MetaMask: Crypto & Web3 Wallet" on Google Play — check for the official publisher
- Open the App → Choose "Import Wallet" or "Create Wallet"
- Recommended approach: Scan the QR code on your computer to sync your existing wallet, don't create a new one
Having the same wallet on both phone and computer is important because you only have one set of seed phrases to manage — seed phrases are universal across devices.
Create Wallet vs Import Wallet
| Action | When to use |
|---|---|
| Create New Wallet | First time using a crypto wallet, starting from scratch |
| Import Existing Wallet | Switching phones/computers, restoring a previous wallet |
Importing is simple:
- Enter your 12 seed phrase words (in order)
- Set a new login password
💡 Pro tip: If you have a Ledger or Trezor hardware wallet, you can connect it to MetaMask. Go to Settings → Connect Hardware Wallet → Select your device. This gives you maximum security for your assets!
Essential MetaMask Security Checklist
✅ Basic Security (Must Do)
- Lock screen password: Set a strong password — no birthdays or "123456"
- Auto-lock: Settings → Security & Privacy → Set auto-lock timer to 1-5 minutes
- Show test networks: Settings → Advanced → Show test networks (for testing only, don't use mainnet for experiments)
✅ Advanced Security (Highly Recommended)
- Hardware wallet integration: Use Ledger/Trezor for large holdings; MetaMask as the interface
- Multiple account isolation: Create several accounts — one for daily interaction, one for long-term storage
- Check approval popups carefully: Every time you connect to a DApp, review what permissions it's requesting; don't authorize unknown contracts
✅ Network Configuration
MetaMask connects to Ethereum mainnet by default. To use other chains (BNB Chain, Polygon, Arbitrum, etc.), you need to add them manually:
Use ChainList (https://chainlist.org) to add networks:
- Open ChainList
- Search for the chain you want (e.g., "BNB Smart Chain")
- Connect MetaMask
- Click "Add Network" → MetaMask prompts for confirmation → Approve
⚠️ Never manually fill in RPC information! RPC addresses you find online could be phishing nodes. All your transaction data passes through this node, so always use ChainList or official documentation.
❌ Common Pitfalls (Avoid These!)
- ❌ Don't enter your seed phrase into unknown websites for "airdrop eligibility"
- ❌ Don't install fake "MetaMask" extensions (verify the publisher carefully)
- ❌ Don't use MetaMask's built-in browser for suspicious links
- ❌ Don't approve unlimited (uncapped) token allowances
FAQ
Q: Is MetaMask free?
Yes, MetaMask is completely free to download and use. The gas fees you pay for transactions go to the blockchain network, not to MetaMask.
Q: Can I transfer coins from an exchange directly to MetaMask?
Yes, but check the network carefully. When withdrawing, select the correct network (e.g., ETH on Ethereum mainnet, USDT on ERC20). Using the wrong network may result in lost funds. Always send a small test amount first before transferring large sums.
Q: Which blockchains does MetaMask support?
MetaMask natively supports Ethereum and all EVM-compatible chains. This includes: BNB Chain, Polygon, Arbitrum, Optimism, Base, Avalanche C-Chain, and many more. You'll need to manually add the corresponding network using the method above.
Q: What if I lose my seed phrase?
There is no way to recover it. Even the MetaMask team cannot help you recover a lost seed phrase — this is by design in decentralized wallets. That's why backup is essential: paper copy + metal plate + at least two storage locations.
Q: How do I verify I have the real MetaMask?
Three checks:
- Official website is metamask.io (not metamask.cc/org/net)
- Chrome Store publisher is "MetaMask" (verify it's official)
- Real MetaMask has tens of millions of users — fakes typically have only a few hundred reviews
Q: Gas fees are too high — any tips?
Try these strategies:
- Transact during off-peak hours (early morning UTC, when the chain is less congested)
- Use Layer 2 networks like Arbitrum, Optimism, or Base (gas fees are ~1/10 of mainnet)
- Use MetaMask's "low priority" option (slower but cheaper)
Q: Can I buy crypto directly in MetaMask?
Partially. MetaMask has a built-in "Buy" feature through third-party providers (Transak, MoonPay) using credit cards, but the fees are relatively high. A more cost-effective approach: buy on an exchange → withdraw to MetaMask.
Q: How do I export my private key?
Go to MetaMask → Account Details → Export Private Key. But your private key is just as important as your seed phrase — never paste it into any online interface after exporting!
About the Author
Written by CoinVado Research, dedicated to helping beginners safely enter the Web3 world.
📚 Continue learning:
- What Are On-Chain Assets? From Wallets to RWA Complete Guide
- Crypto Wallet Guide: Cold Wallet vs Hot Wallet vs Exchange Wallet
- Top 10 Essential Crypto Tools for 2026
- LianShang Guide — More blockchain education
- Want to buy crypto? Try Binance or OKX
Disclaimer: This article is for educational purposes only and does not constitute investment advice. Cryptocurrency investment carries risks. Please make informed decisions based on your own circumstances.